A Windows 11 update should make your computer better. But sometimes it does the opposite — and one of the most reported side effects is an external hard drive that worked perfectly before the update suddenly becoming invisible to the PC.
If this sounds familiar, you are not alone. This is a documented issue affecting hundreds of thousands of Windows 11 users, particularly after cumulative updates like KB5034765 and feature updates to version 23H2. The good news is that there are reliable fixes, and you do not need any technical background to apply them.
This guide gives you five fixes in order of simplicity — start with Fix 1 and work your way down until the drive reappears.
In This Guide
Fix 1 — Roll back the Windows 11 update
Fix 2 — Update or roll back the USB/storage driver
Fix 3 — Run the Hardware and Devices Troubleshooter
Fix 4 — Reassign the drive letter in Disk Management
Fix 5 — Edit the StorAHCI registry key (advanced)
Why Windows 11 Updates Break External Hard Drive Detection
Windows 11 updates are large packages. They update not just security patches and features, but also the low-level drivers that control how your computer talks to connected hardware — including USB ports and storage devices.
Occasionally, a new driver version conflicts with an existing one, overwrites a working configuration, or introduces a bug that prevents Windows from correctly enumerating (recognising) attached drives. This is not user error — it is a known limitation of how Windows update packaging works.
How Windows updates silently overwrite USB and storage drivers
When Windows installs an update, it replaces driver files without always checking whether the existing version is working correctly. The update assumes the newest driver is the best one — which is usually true, but not always.
The three driver areas most often affected by this are:
- USB Controller drivers — control communication between the USB port and Windows
- StorAHCI / disk storage drivers — handle how storage devices are connected via SATA and USB bridges
- Generic USB hub drivers — manage power delivery and device handshaking on USB hubs
When any of these are overwritten with a broken or incompatible version, external drives connected to those ports stop showing up — even though the drive itself is completely fine.
Which Windows 11 updates are known to cause this (KB numbers)
Microsoft tracks known issues with each update. The updates most frequently reported as causing external hard drive detection problems include:
| Update KB Number | Known impact |
| KB5034765 | February 2025 cumulative update — widely reported USB storage issues |
| KB5031455 | October 2024 feature update — affected some StorAHCI configurations |
| KB5033375 | January 2025 security update — impacted some USB 3.0 hubs |
| 23H2 Feature Update | Broad driver refresh — caused detection issues on some OEM hardware |
You can check Microsoft’s official list of known issues for each update at the Windows 11 release health dashboard — it is updated regularly as bugs are confirmed and fixed.
Fix 1 – Roll Back the Problematic Windows 11 Update
The most direct fix is to remove the update that caused the problem. Windows 11 makes this straightforward through the Update History page in Settings. This will not affect your personal files.
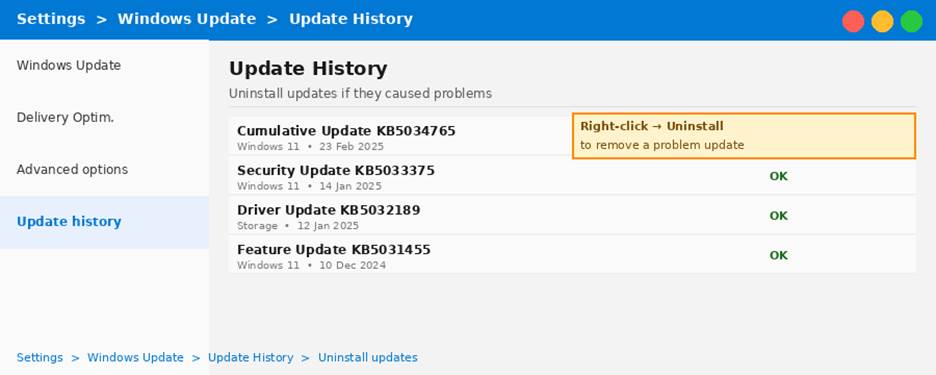
Windows 11 Update History — find and uninstall the update that broke your drive detection
How to find which update caused the problem (Update History)
- Open Settings by pressing the Windows key + I.
- Go to Windows Update in the left sidebar.
- Click Update History.
- Look at the dates. Find the most recent update installed — particularly any Cumulative Update or Feature Update.
- Cross-reference the KB number with the table above. If it matches, that is your likely culprit.
Step-by-step: uninstall the update via Settings
- In Update History, scroll down and click Uninstall updates.
- Find the update you identified. Click Uninstall next to it.
- Follow the prompts. Windows may ask you to confirm or restart.
- After restarting, plug in your external drive and check if it is now detected.
| Microsoft Official Guide — Uninstalling Windows Updates If you need more detail on this process, Microsoft’s own support page walks through every step. → How to uninstall updates in Windows — Microsoft Support |
If your drive is still not appearing after a rollback, it may be a broader Windows 11 issue. See our guide on Common Windows 11 Problems and How to Fix Them for additional Windows-specific troubleshooting steps.
Fix 2 – Update or Roll Back the USB / Storage Driver
If rolling back the Windows update did not help, or if you would prefer not to remove system updates, the next step is to fix the driver directly. You can do this through Device Manager without touching the update itself.
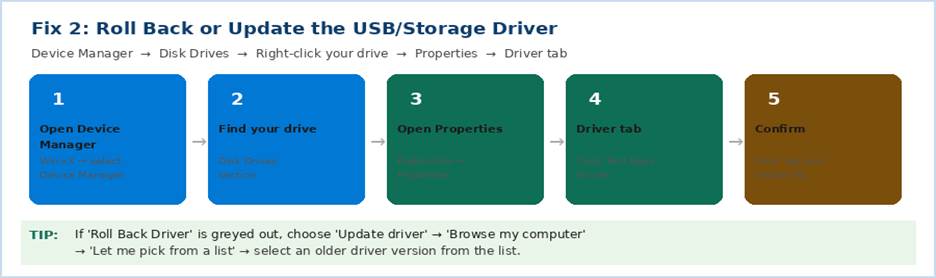
Fix 2: Five steps to roll back or update your USB storage driver via Device Manager
Checking your driver version in Device Manager
- Right-click the Start button and choose Device Manager.
- Expand Disk Drives. Your external drive should appear here — sometimes listed by brand (e.g. Seagate, WD, Samsung) or as ‘USB Mass Storage Device’.
- Right-click the drive and choose Properties.
- Click the Driver tab. Note the Driver Version and Driver Date shown.
- If the date matches the Windows update you installed, that confirms this driver is the one that changed.
How to roll back a driver in Windows 11
- Still on the Driver tab in Properties, click Roll Back Driver.
- If the button is greyed out (no previous version saved), click Update Driver instead.
- Choose Browse my computer for drivers, then Let me pick from a list of available drivers.
- Select an older version from the list if available, then click Next.
- Restart your PC after the driver installs.
| Microsoft Official Guide — Updating Drivers in Windows Microsoft’s driver update guide covers all methods including manual installation from the manufacturer’s website. → Update drivers manually in Windows — Microsoft Support |
Fix 3 – Run the Windows Hardware and Devices Troubleshooter
Windows 11 includes a built-in troubleshooter that specifically diagnoses and repairs hardware detection problems. It is often overlooked, but it can fix driver conflicts and configuration errors automatically — in under two minutes.
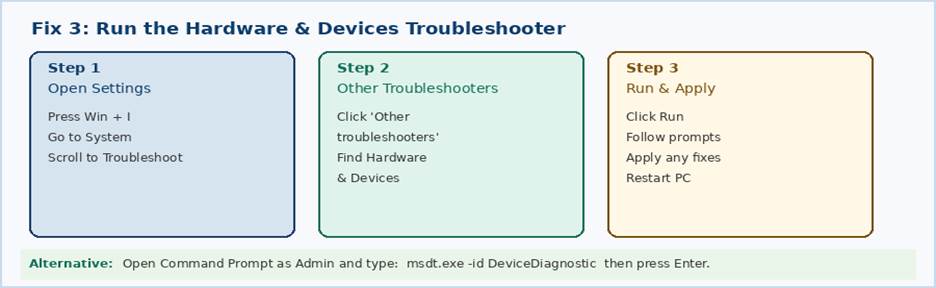
Fix 3: Three steps to run the Windows 11 Hardware and Devices Troubleshooter
- Press the Windows key + I to open Settings.
- Go to System, then scroll down to Troubleshoot.
- Click Other troubleshooters.
- Find Hardware and Devices and click Run.
- The troubleshooter will scan for problems. Follow any prompts it gives you.
- Restart your PC and plug the drive back in.
Alternatively, open the Command Prompt as Administrator (search ‘cmd’, right-click, Run as administrator) and type:
msdt.exe -id DeviceDiagnostic
Press Enter and the troubleshooter will launch directly. This method bypasses the Settings menus entirely.
Fix 4 – Reassign the Drive Letter in Disk Management
Sometimes a Windows update reshuffles drive letter assignments during installation. Your external drive may actually be connected and recognised by Windows — it just has no letter, so it does not appear in File Explorer. Disk Management will tell you if this is the case.
- Press Windows key + R, type diskmgmt.msc, and press Enter.
- Look through all the listed disks. Find your external drive — identify it by its size.
- If it appears but has no letter (no D:, E:, etc. shown), right-click it and choose Change Drive Letter and Paths.
- Click Add, pick a letter from the dropdown (e.g. E:), and click OK.
- Open File Explorer. The drive will now appear.
For a more detailed walkthrough of this process with screenshots, see our full guide: External Hard Drive Not Showing Up on PC Fix which covers Disk Management step by step.
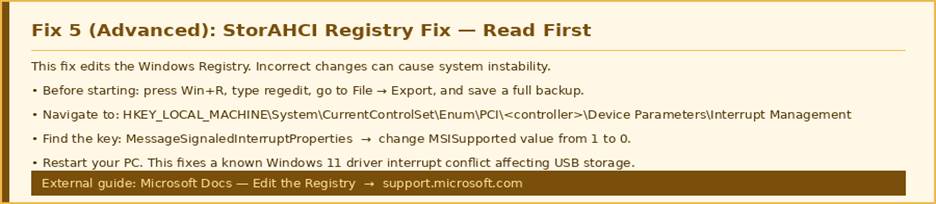
Fix 5 – Edit the StorAHCI Registry Key (Advanced Fix)
This fix is for users who have tried everything above and the drive is still not showing up. It addresses a specific Windows 11 bug where a registry value called MSISupported is incorrectly set to 1, causing a driver interrupt conflict that blocks USB storage detection.
This fix requires editing the Windows Registry. It is safe if you follow the steps carefully and back up first — but skip this fix if you are not comfortable following multi-step technical instructions.
Fix 5: The StorAHCI registry key fix — always back up before editing the Registry
Back up the Registry first — step by step
- Press Windows key + R, type regedit, and press Enter.
- In the Registry Editor, go to File in the top menu.
- Click Export.
- Save the file somewhere easy to find (like your Desktop) as registry_backup.reg.
- This backup lets you undo any changes if something goes wrong.
| Microsoft Official Guide — Backing Up and Editing the Registry Always create a backup before editing the Registry. Microsoft’s guide explains how to back up and restore it safely. → How to back up and restore the registry in Windows — Microsoft Support |
The StorAHCI MSISupported registry fix
- In Registry Editor, navigate to: HKEY_LOCAL_MACHINE → System → CurrentControlSet → Enum → PCI.
- Look for a key that starts with VEN_8086 (or your storage controller vendor). Expand it.
- Expand the sub-key until you reach Device Parameters → Interrupt Management → MessageSignaledInterruptProperties.
- In the right panel, double-click MSISupported.
- Change the value from 1 to 0. Click OK.
- Close Registry Editor and restart your PC.
After restarting, plug in your external drive. In most cases where this registry value was the cause, the drive will now appear immediately.
When to Contact Microsoft Support
If none of the five fixes above have resolved the problem, it is time to escalate. Microsoft Support can run deeper diagnostics, check whether your specific update batch had a targeted bug fix, and in some cases arrange a direct patch.
| Situation | Recommended Action |
| You have tried all 5 fixes above and the drive is still not detected | Contact Microsoft Support directly |
| The drive works on another PC but not on yours after updating | May need OEM-specific driver — contact your PC manufacturer |
| Multiple USB devices stopped working — not just the hard drive | Likely a USB controller issue — escalate to Microsoft |
| Windows shows a ‘driver error’ code in Device Manager | Note the error code and report it to Microsoft Support |
Visit the Microsoft Support page for Windows 11 hardware issues at support.microsoft.com — you can start a chat or schedule a callback without waiting on hold.
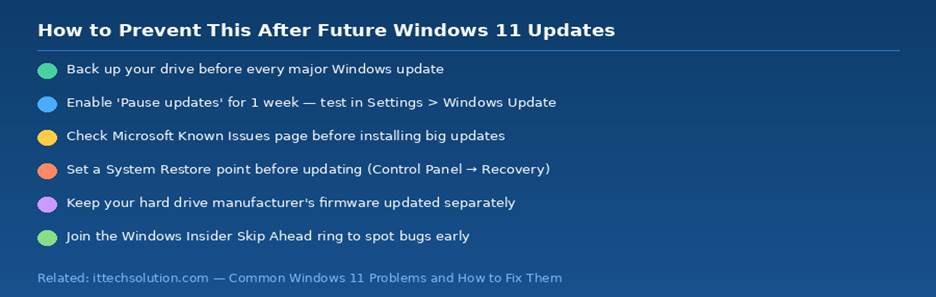
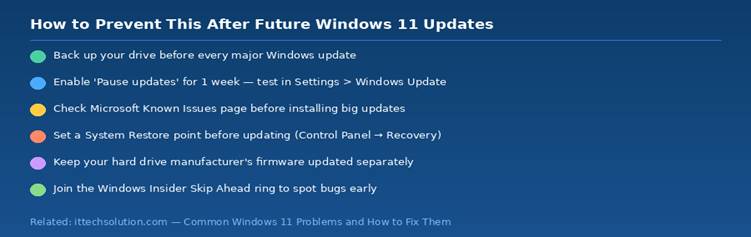
How to Prevent This After Future Windows 11 Updates
Once you have fixed the problem, a few simple habits will significantly reduce the chance of it happening again after the next Windows update.
Six habits that protect your hard drive detection from future Windows 11 updates
- Back up your important files before every major update. A drive that stops showing up cannot be read — but a backup keeps you safe regardless.
- Pause Windows updates for one week. Go to Settings → Windows Update → Advanced Options → Pause updates. This gives the community time to report any serious bugs before you install.
- Check the Microsoft Known Issues dashboard before updating.
Microsoft Windows 11 release health dashboard lists confirmed bugs in each update — check it before you click Install.
- Set a System Restore point before big updates. Open Control Panel → System → System Protection → Create. This gives you a one-click rollback option if anything breaks.
- Keep your hard drive manufacturer’s drivers updated separately. WD, Seagate, and Samsung all publish their own drive management tools with driver updates — these are often more stable than the generic Windows versions.
For a wider look at what Windows 11 updates can affect, see our full guide: Common Windows 11 Problems and How to Fix Them.
Frequently Asked Questions
Will uninstalling a Windows update put my computer at risk?
For short periods, yes — uninstalling a security update removes that protection temporarily. However, if the update broke critical hardware like your external storage, the practical risk of losing data outweighs the temporary security exposure. Re-install the update once Microsoft releases a patched version, which typically takes 2–4 weeks.
How do I know which update broke my drive?
Go to Settings → Windows Update → Update History and look for updates installed on or just before the day the drive stopped appearing. Cumulative Updates and Feature Updates are the most common culprits. Cross-reference the KB number with online reports to confirm.
My drive shows in Disk Management but not in File Explorer after the update — why?
This typically means the update reshuffled your drive letter assignments. Follow Fix 4 in this guide to reassign the letter. For a full step-by-step walkthrough,see our related article: External Hard Drive Not Showing Up on PC Fix.
Can a Windows 11 update physically damage my external hard drive?
No. Windows updates affect drivers and software — they cannot cause physical damage to hardware. If your drive is clicking, grinding, or not spinning up at all, that is a mechanical issue unrelated to the update. In that case, stop using the drive immediately and seek professional data recovery.
See our related guide: Hard Drive Clicking Noise Fix — What It Means and How to Respond.
Will my files still be safe while I apply these fixes?
The fixes in this guide (rollback, driver updates, troubleshooter, drive letter change) do not delete or modify any files on your drive. Only Fix 4 (formatting) would erase data — and that is not recommended in this guide unless the drive was empty. Your files remain intact throughout the diagnostic process.
If you are worried about data safety, read: How to Recover Files from a Failed Hard Drive before attempting any further steps.
Quick Summary — 5 Fixes at a Glance
| Fix | How to do it |
| Fix 1 — Uninstall the problematic Windows 11 update | Settings → Windows Update → Update History → Uninstall updates |
| Fix 2 — Roll back or update the USB/storage driver | Device Manager → Disk Drives → Properties → Driver → Roll Back |
| Fix 3 — Run the Hardware & Devices Troubleshooter | Settings → System → Troubleshoot → Other troubleshooters → Run |
| Fix 4 — Reassign the drive letter | Windows key + R → diskmgmt.msc → right-click drive → Change Drive Letter |
| Fix 5 — Edit the StorAHCI registry key (advanced) | Regedit → StorAHCI → MSISupported → change from 1 to 0 |
Worked? Great — remember to re-enable Windows Update once Microsoft patches the issue. Still stuck? Drop a comment below or visit the ITTechSolution support page.