Fix AirPrint not working · Set up wireless printing · Install Windows on Mac via Boot Camp · Resolve Boot Camp problems
Introduction
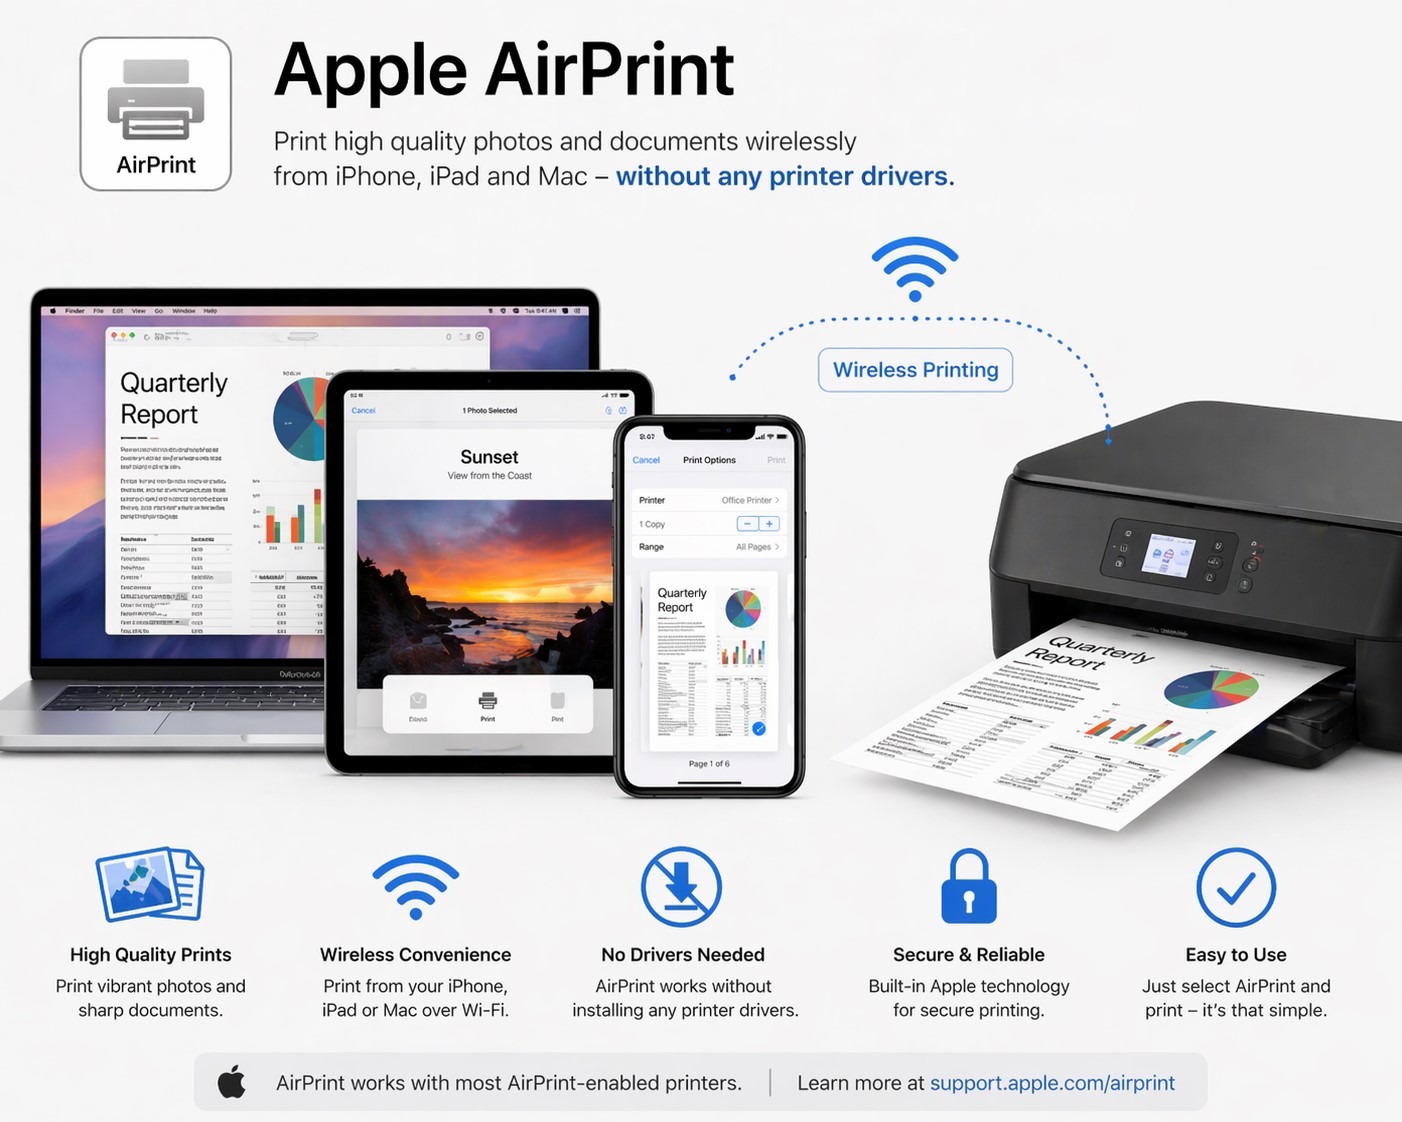
AirPrint is one of Apple’s most useful technologies — the ability to print high-quality documents, photos, and emails wirelessly from an iPhone, iPad, or Mac without installing any printer drivers. But when AirPrint is not working, the “No AirPrint Printers Found” error appears, or the printer shows as offline, the experience quickly becomes one of the most frustrating in the Apple ecosystem. The good news is that the vast majority of AirPrint problems have a clear, repeatable fix.

| 📌 Who this guide is for iPhone, iPad, and Mac users who cannot print wirelessly, IT professionals setting up AirPrint on Windows networks using Bonjour Service, Mac users who want to run Windows via Boot Camp, and anyone troubleshooting AirPrint compatibility issues after an iOS or macOS update. Covers iOS 4.2 through iOS 17+, OS X Leopard through macOS, and Windows 7 through Windows 11. |
| SECTION 1 How AirPrint Works — and Why It Fails |
AirPrint is an Apple print technology built into iOS 4.2 and later, and natively available in OS X 10.7 and later (default from OS X 10.8). It allows any Apple device — iPhone, iPad, iPod touch, or Mac — to print high-quality documents, photos, and emails to an AirPrint-enabled printer without installing any drivers or additional software. The technology is integrated into all major printer brands including Canon, Epson, Brother, Lexmark, Kyocera, HP, and Xerox. Apple provides a zero-cost license for printer manufacturers to implement it.
AirPrint uses the Bonjour protocol (Apple’s implementation of zero-configuration networking, also known as mDNS) to discover printers on the local network automatically. Both the Apple device and the printer must be on the same local Wi-Fi network for this discovery to work. AirPrint does not work on public wireless networks, guest Wi-Fi networks, or mobile hotspots — this is the single most common cause of the “No AirPrint Printers Found” error.
Why AirPrint fails — the four root causes
- Network mismatch — the iPhone or iPad is on a different Wi-Fi network, a guest network, or a public hotspot while the printer is on the main local network.
- Bonjour/mDNS blocked — a router, firewall, or enterprise network configuration is blocking mDNS traffic (port 5353), which AirPrint depends on for printer discovery.
- VPN interference — an active VPN on the device routes all traffic through a remote server, bypassing the local network and preventing the device from seeing local printers.
- Outdated printer firmware — printer manufacturers release firmware updates that add or improve AirPrint compatibility. A printer that worked previously may stop working after an iOS or macOS update if its firmware has not been updated to match.
| SECTION 2 Quick Finder: Identify Your Problem |
Find your exact symptom below and go directly to the right section.
| Your situation right now | Most likely cause | Go to |
| “No AirPrint Printers Found” on iPhone or iPad | Different Wi-Fi networks, VPN active, or Bonjour blocked | Section 5 — AirPrint Troubleshooting |
| AirPrint printer shows as offline | Printer not on same network or firmware issue | Section 5 — AirPrint Troubleshooting |
| AirPrint stopped working after iOS 17 update | iOS 17 Private Wi-Fi Address or VPN interference | Section 6 — iOS 17 Fix |
| Want to print from iPhone/iPad/Mac — first-time setup | AirPrint not yet configured on the printer/network | Section 3 — AirPrint Setup |
| Want to print from iPhone to a Windows PC-connected printer | AirPrint Activator with Bonjour not installed on Windows | Section 4 — AirPrint Activator |
| AirPrint not available on Windows 11 network | Bonjour Service / port 5353 not configured | Section 4 — AirPrint Activator |
| Want to run Windows on a Mac | Boot Camp not yet set up | Section 7 — Boot Camp Install |
| Mac screen goes black during Windows Boot Camp install | ATIKMDAG.SYS graphics driver conflict | Section 8 — Boot Camp Fix |
| Audio problems or slow performance after Boot Camp | kbdmgr.exe, NVIDIA PowerMizer, or Write Combining issue | Section 8 — Boot Camp Fix |
| SECTION 3 How to Set Up AirPrint on Windows, Mac, and iOS |
AirPrint setup is different depending on which platform you are configuring it from. On iOS and Mac, setup is nearly automatic if the printer is AirPrint-enabled and connected to the same Wi-Fi network. On Windows, it requires additional steps to expose a shared printer as an AirPrint destination for Apple devices.
Printing from iPhone, iPad, or iPod touch
This is the simplest scenario. Ensure your iPhone, iPad, or iPod touch and the printer are both connected to the same local Wi-Fi network — this is the only hard requirement.
- Open the app or document you want to print.
- Tap the Share icon (the box with an arrow pointing up) or the Arrow icon, depending on the app.
- Scroll down and tap Print.
- Tap Select Printer — if the printer is AirPrint-enabled and on the same network, it appears in the list automatically.
- Choose the number of copies.
- Tap Print in the top-right corner.
| ⚠️ AirPrint does not work on public or guest Wi-Fi “No AirPrint Printers Found” almost always means the device and printer are not on the same local Wi-Fi network. AirPrint is not supported on public wireless networks or hotspots. If you are connected to a guest network at an office or hotel, switch to the main private network. |
Setting up AirPrint on Windows (for printing from Apple devices)
Windows does not support AirPrint natively. To print from an iPhone or iPad to a printer connected to a Windows PC, you need to share the printer and install Bonjour Print Services on the Windows machine.
- In the Windows search bar, type Printers & Scanners and open it.
- Select the printer, click Manage, then click Printer Properties.
- Click the Sharing tab, check the “Share this printer” box, and click OK.
- Download and install Bonjour Print Services from Apple’s website.
- In Windows Firewall settings, open port 5353 (required for Bonjour/mDNS discovery).
- Download and install the AirPrint components for Windows.
- Set the AirPrint Service to start automatically (Startup Type: Automatic).
After completing these steps, AirPrint is enabled on the Windows machine. Your iPhone or iPad will be able to discover and print to the shared printer over the local Wi-Fi network.
Setting up AirPrint on Mac
Macs running OS X 10.7 or later support AirPrint natively. If a connected printer is AirPrint-compatible, it appears automatically in the Print dialog on any iOS or macOS device on the same network. To verify: go to System Settings (or System Preferences on older macOS) → Printers & Scanners — the AirPrint printer appears listed there. No additional configuration is required.
AirPrint-compatible printer brands
The following major printer brands manufacture AirPrint-compatible models: Canon, Epson, Brother, Lexmark, Kyocera, HP, and Xerox. When purchasing a new printer, check the product specifications for AirPrint support, or consult Apple’s official AirPrint printer list at support.apple.com.
Step-by-step guide:
- → How to set up AirPrint on Windows, Mac, and iOS — Full setup instructions, Bonjour, port 5353, printer brands
| SECTION 4 AirPrint Activator for Windows — Full Installation Guide |
AirPrint Activator is software that creates a WiFi Print Server on a Windows PC, making any shared printer accessible to Apple devices — iPhone, iPad, and iPod touch — running iOS 4.2.1 and higher. It communicates between the iPhone’s wireless signals and the printer, so your iOS device can find and use a printer connected to a Windows machine as if it were a native AirPrint printer.
What you need before installing
- A printer shared on the Windows PC (see Section 3 for sharing steps).
- iTunes installed on the Windows PC — or, if iTunes is not installed, Bonjour Print Services downloaded directly from Apple.
- Administrator rights on the Windows machine.
Installation on Windows 7, 10 (32-bit)
Extract the AirPrint Activator zip file to a folder named AirPrint at C:\Program Files\AirPrint. Open Command Prompt as Administrator and run:
sc.exe create AirPrint binPath= “C:\Program Files\AirPrint\airprint.exe -s” depend= “Bonjour Service” start= auto
sc.exe start AirPrint
Installation on Windows 7, 10 (64-bit)
Extract to C:\Program Files (x86)\AirPrint. Open Command Prompt as Administrator and run:
sc.exe create AirPrint binPath= “C:\Program Files (x86)\AirPrint\airprint.exe -s” depend= “Bonjour Service” start= auto
sc.exe start AirPrint
Installation on Windows 11
If Bonjour Print Services is not already installed, download it directly from the Apple website and install it first. Then download the AirPrint Activator for Windows installer. Extract the file and run the AirPrint Activator .exe with Administrator rights. On the service configuration screen, set the Service to Startup: Automatic, then click the Start button. After the service starts, open Safari on your iPhone or iPad — you will see a Print option. Select the printer and tap Print. Approve the authentication prompt when it appears.
Adding AirPrint to the Windows Firewall exclusions list
After installation, add the AirPrint executable to your firewall’s exclusions list. The path is C:\AirPrint\Airprint.exe. Without this exclusion, the Windows Firewall may silently block the Bonjour Service broadcast, causing the printer to be invisible to iOS devices despite the service running correctly.
Testing AirPrint from iOS
From your iPhone or iPad, tap the Share icon in Safari, Mail, or any app, select Print, and the shared Windows printer should appear in the printer list. If it does not appear, verify that the iOS device and Windows PC are on the same local Wi-Fi network, that port 5353 is open in the Windows Firewall, and that the Bonjour Service is running (check Services in Windows, look for “Bonjour Service” — Status: Running).
Step-by-step guide:
- → AirPrint Activator for Windows — enable wireless printing from iPhone — Bonjour Service, sc.exe commands, 32-bit and 64-bit paths, Windows 11
| SECTION 5 AirPrint Not Working — Complete Troubleshooting Guide (2025) |
AirPrint not working is one of the most searched Apple-related printing problems. When your AirPrint printer is not detected, shows offline, or fails after a software update, the fix is almost always one of five things: a network mismatch, outdated printer firmware, a router or firewall blocking Bonjour, an active VPN, or a printer that does not support AirPrint at all. This section covers all of them in order of likelihood.
Fix 1: Verify both devices are on the same Wi-Fi network
This is the cause in the majority of cases. Open Settings on your iPhone or iPad and check the Wi-Fi network name. Then check the network your printer is connected to — via the printer’s own display, its web interface, or the printer app. They must be on the same network name (SSID). Guest networks, corporate segregated networks, and mobile hotspots will all prevent AirPrint from working even if both devices appear to have internet access.
Fix 2: Restart the printer and the router
Power off the printer, wait 30 seconds, and power it back on. Restart your Wi-Fi router. On your iPhone or iPad, turn Wi-Fi off and back on to force a fresh network association. Then try printing again. This resolves a significant proportion of intermittent “printer not found” errors caused by stale Bonjour discovery caches.
Fix 3: Update the printer firmware
Printer manufacturers release firmware updates specifically to maintain compatibility with new iOS and macOS versions. Visit your printer manufacturer’s website (HP, Canon, Epson, Brother, Lexmark, Kyocera, or Xerox), find your printer model, and download the latest firmware. Install it following the manufacturer’s instructions. After updating, restart the printer and attempt AirPrint again.
Fix 4: Disable VPN on the Apple device
An active VPN connection on your iPhone or iPad routes all network traffic through a remote server, making the device effectively invisible on the local network. This is a common problem in corporate environments where a VPN auto-connects on startup. To turn it off: go to Settings → General → VPN & Device Management → VPN, and toggle it off. Then test AirPrint. If printing works with VPN off, the VPN configuration needs a split-tunnel rule that excludes local network traffic.
Fix 5: Disable Private Wi-Fi Address
iOS generates a private MAC address for each Wi-Fi network to prevent cross-network tracking. On some networks and with some printers, this causes discovery problems. To disable it for the current network: go to Settings → Wi-Fi, tap the information (i) button next to your network name, and toggle off Private Wi-Fi Address. Reconnect to the network and test AirPrint.
Fix 6: Enable AirPrint on the printer
Some printers have AirPrint disabled in their settings by default. Access the printer’s web interface (enter its IP address in a browser), navigate to network or wireless settings, and verify that AirPrint is enabled. The exact menu path varies by manufacturer.
Fix 7: Reset printer network settings
On the printer, go to Settings → Reset Network (the exact path varies by model and brand). Reconnect the printer to your Wi-Fi network from scratch. This resolves cases where the printer has cached an old network configuration that prevents it from broadcasting correctly on the current network.
Fix 8: Use Wi-Fi Direct as an alternative
If your printer supports Wi-Fi Direct, you can connect your iPhone directly to the printer without going through a Wi-Fi router. Check your printer’s manual for Wi-Fi Direct setup instructions. This is particularly useful in environments where network segmentation prevents normal AirPrint discovery.
Fix 9: Use third-party AirPrint alternatives
For printers that do not natively support AirPrint, third-party applications like HandyPrint and Printopia can bridge non-AirPrint printers to iOS devices. These applications run on a Mac and advertise connected printers as AirPrint destinations on the local network, enabling wireless printing from iPhone and iPad to virtually any printer.
Fix 10: Connect using the printer’s IP address directly
If automatic Bonjour discovery is blocked by router settings, you can add the printer manually using its IP address. On your Mac: go to System Settings → Printers & Scanners → click the + button → select the IP tab → enter the printer’s IP address. On iOS, this is not available natively — use the printer manufacturer’s app from the App Store to add the printer by IP.
Step-by-step guide:
- → AirPrint not working — troubleshooting guide & easy fixes (2025) — All 10 fixes, Bonjour/mDNS, HandyPrint, Printopia, IP address method
| SECTION 6 AirPrint Not Working After iOS 17 Upgrade |
A specific wave of AirPrint failures was reported after the iOS 17 upgrade. Users who had been printing reliably found that after updating, the printer was no longer detected or that printing failed silently. The cause is a combination of iOS 17’s more aggressive Private Wi-Fi Address behaviour and tighter VPN handling that, on some network configurations, breaks the local Bonjour discovery that AirPrint depends on.
Step-by-step fix for iOS 17 AirPrint problems
- Ensure the printer is AirPrint-enabled — check Apple’s official support page or the printer’s specifications for AirPrint compatibility.
- Connect your iPhone and the printer to the same local Wi-Fi network. Open Settings → Wi-Fi and confirm the SSID matches the network the printer is on.
- Disable any VPN: go to Settings → General → VPN & Device Management and toggle VPN off.
- Turn off Private Wi-Fi Address for the current network: Settings → Wi-Fi → tap the (i) next to your network → toggle Private Wi-Fi Address to Off.
- Restart both the iPhone and the printer.
- Attempt to print again. If the printer appears, it is working.
- If the printer still does not appear and it supports Wi-Fi Direct, connect directly via Wi-Fi Direct — this bypasses the local network discovery entirely.
- For non-AirPrint printers, download the printer’s official app from the App Store and follow the app’s connection instructions.
| 💡 Firmware update is often the permanent fix Many iOS 17 AirPrint failures are resolved permanently by updating the printer’s firmware. Printer manufacturers (HP, Canon, Epson, Brother, Lexmark, Kyocera, Xerox) release firmware updates specifically to maintain compatibility with new iOS versions. Check the manufacturer website for your model and install the latest firmware. |
| SECTION 7 Install Windows on Mac Using Boot Camp |
Boot Camp is a multi-boot utility integrated into Apple Mac computers that enables users to install and run Microsoft Windows on Intel-based Macs alongside macOS. It handles disk partitioning, Windows driver installation, and provides a startup selection mechanism so you can choose which operating system to load at boot time.
System requirements
- A Windows 7 (or later) installation disc or ISO.
- OS X Leopard or Snow Leopard (or later) operating system disc.
- At least 10 GB of free hard disk space — 16 GB is recommended for Windows 7 to allow room for applications and software.
Step-by-step: installing Windows 7 on Mac via Boot Camp
- On your Mac, navigate to Applications → Utilities and double-click Boot Camp Assistant.
- Click Continue on the Introduction screen. Ignore the fact that it may not mention Windows 7 specifically — it works.
- Partition the disk using the Boot Camp Assistant partition slider. Allocate more than 16 GB to the Windows partition if you plan to install applications. Drag the divider to adjust partition sizes.
- The Boot Camp hard drive partition appears on the Desktop.
- Insert the Windows 7 installation disc. The Mac restarts and prompts you to choose which partition to install Windows on.
- Select the Boot Camp partition and format it (NTFS format is required). Continue with the Windows 7 installation process.
- Once Windows installation completes, remove the disc and reboot.
- Insert your OS X Leopard (or Snow Leopard) DVD. When prompted, select Run setup.exe. Navigate to the Boot Camp folder in the DVD and run setup.exe. The Boot Camp launcher installs Windows drivers including video drivers, audio, trackpad, and keyboard drivers.
- After setup completes, run Apple Software Update for Windows to get the latest driver updates.
- The Mac reboots. Hold down the Option key during startup to select which operating system to boot — macOS or Windows 7.
Important Boot Camp notes
- Boot Camp 2.0 (included with OS X 10.5 Leopard) provides more complete driver support than older versions, including previously missing device drivers.
- The Windows partition size cannot be resized after creation through Boot Camp. If you need to change it, you must remove the Windows partition entirely and recreate it. The alternative is to use Unix tools or iPartition to resize without destroying the partition.
- Boot Camp also supports Windows 10 and later. Check Apple’s official Boot Camp support page (support.apple.com/en-in/HT201468) for the latest compatibility information.
Uninstalling Windows and removing the Boot Camp partition
- Start up in macOS.
- Quit all open programs and log out any other users.
- Open Boot Camp Assistant.
- Select “Create or remove a Windows partition” and click Continue.
- Click Restore (for single-disk Macs) or select the disk containing Windows and choose “Restore to a single Mac OS partition.”
Step-by-step guide:
- → How to install Windows 7 on Mac using Boot Camp — Full partition and driver installation, Option key selection, Boot Camp 2.0
- → Apple Support: AirPrint-compatible printers — official list
- → Apple Support: Install Windows on your Mac with Boot Camp — official guide
| SECTION 8 Fix Boot Camp Problems on Mac |
Boot Camp on Mac has several well-documented problems that users encounter during and after Windows installation. The most serious is a black screen that appears during the Windows 7 installation process — the system hangs with a blank screen after the Windows logo animation, preventing installation from completing. Audio performance issues and input device problems are also common after a successful installation.
Problem 1: Screen goes black during Windows Boot Camp installation
This is caused by a graphics driver conflict. The ATIKMDAG.SYS driver (ATI/AMD graphics driver) in the Windows installation is incompatible with the Mac’s GPU configuration, causing the display to go blank after the Windows animated logo appears.
Fix for black screen / ATIKMDAG.SYS
- When the screen goes black and hangs, press and hold the power button on your Mac until it shuts down.
- Start the Mac again while holding the Alt key (Option key) to access the startup manager, then select and load Mac OS X Snow Leopard.
- Run an application that allows access to NTFS partitions — this is needed to access the Windows Boot Camp partition from macOS.
- Navigate to the Boot Camp partition and find the file: C:\WINDOWS\SYSTEM32\DRIVERS\ATIKMDAG.SYS
- Delete ATIKMDAG.SYS.
- Restart the Mac and boot into Windows 7.
- Windows 7 should now boot normally without the black screen.
- Run Windows Update and install Boot Camp drivers from the Mac OS X installation disc to restore full graphics support with the correct drivers.
Problem 2: Audio performance issues — kbdmgr.exe
kbdmgr.exe is a Boot Camp software component that enables trackpad touch commands and hardware volume and brightness controls. It causes audio performance problems on some Mac configurations — audio stutters, drops, or distorts while it is running. Disabling it resolves the issue without removing Boot Camp functionality.
To disable kbdmgr.exe: click Start → Run → type msconfig and press OK. Click the Startup tab. Untick kbdmgr and click OK. Restart the system.
Problem 3: Disabling NVIDIA PowerMizer for better performance
NVIDIA PowerMizer is an automatic power management feature in NVIDIA graphics drivers that scales the GPU clock speed down to save power. On some Mac Boot Camp configurations, PowerMizer causes significant performance degradation or display stuttering. To disable it: right-click the desktop → Properties → Settings → Advanced → GeForce 8600M GT → Mobile → Change PowerMizer Settings → select “Not manage my power consumption.”
Problem 4: Disabling graphics write combining
If you are experiencing display performance issues or visual artefacts in Windows running on Boot Camp, disable graphics write combining: right-click the desktop → Properties → Settings → Advanced → Troubleshooting → untick “Enable Write Combining.” This is particularly effective on older Mac GPU configurations where write combining causes rendering inconsistencies.
| 💡 Install Boot Camp drivers immediately after Windows installation After any Windows installation via Boot Camp, always run the Boot Camp driver installation from the Mac OS X disc before doing anything else in Windows. This installs the correct Apple-specific drivers for the GPU, audio, keyboard, trackpad, and network adapter — resolving the majority of device and performance issues in one step. |
Step-by-step guide:
- → How to fix Boot Camp problems on Mac — ATIKMDAG.SYS black screen fix, kbdmgr.exe audio fix, PowerMizer, write combining
Frequently Asked Questions
Why does my iPhone show “No AirPrint Printers Found”?
Your iPhone and printer are on different Wi-Fi networks, or you are on a guest/public network. AirPrint requires both devices on the same local Wi-Fi network. Also check that no VPN is active on the iPhone, as VPN routes traffic away from the local network.
How do I set up AirPrint on Windows?
Share the printer in Windows (Printers & Scanners → Properties → Sharing tab). Install Bonjour Print Services from Apple. Open port 5353 in Windows Firewall. Install the AirPrint Activator service using sc.exe with the Bonjour Service dependency. Your iPhone can then discover and print to it.
Why did AirPrint stop working after the iOS 17 update?
Share the printer in Windows (Printers & Scanners → Properties → Sharing tab). Install Bonjour Print Services from Apple. Open port 5353 in Windows Firewall. Install the AirPrint Activator service using sc.exe with the Bonjour Service dependency. Your iPhone can then discover and print to it.
Can I print from iPhone to a non-AirPrint printer?
Yes. Use third-party apps like HandyPrint or Printopia (both run on Mac and advertise non-AirPrint printers to iOS devices), or download your printer manufacturer’s official app from the App Store. Wi-Fi Direct is another option if the printer supports it.
How do I install Windows on a Mac using Boot Camp?
Open Boot Camp Assistant (Applications → Utilities), partition the disk with at least 16 GB for Windows, insert the Windows disc, install Windows on the Boot Camp partition, then install Boot Camp drivers from the macOS disc. Hold Option at startup to choose between macOS and Windows.
Why does my Mac screen go black during Boot Camp Windows installation?
The ATIKMDAG.SYS graphics driver in the Windows installer is incompatible with the Mac GPU. Boot back into macOS, navigate to the Boot Camp partition, delete C:\WINDOWS\SYSTEM32\DRIVERS\ATIKMDAG.SYS, then reboot into Windows. Install the correct Boot Camp graphics drivers afterward.
Does AirPrint work on Windows?
Not natively. Windows does not include Bonjour/mDNS support by default. To make a Windows-connected printer available via AirPrint, install Bonjour Print Services from Apple, share the printer, open port 5353 in the firewall, and install the AirPrint Activator service using sc.exe.
Conclusion
AirPrint problems are almost always network problems in disguise. The majority of “No AirPrint Printers Found” errors, printer not detected issues, and AirPrint failures after iOS 17 upgrades trace back to one of four things: the device and printer are on different networks, an active VPN is blocking local network access, the Private Wi-Fi Address feature is interfering with Bonjour discovery, or the printer firmware needs updating. Work through those four checks first — they resolve the issue in most cases without any further troubleshooting.
For Windows users who need to make a printer available to Apple devices, the AirPrint Activator with Bonjour Service and the sc.exe service creation commands turn any shared Windows printer into an AirPrint destination. For Mac users who need Windows, Boot Camp Assistant handles the entire partitioning and driver installation process — and the ATIKMDAG.SYS and kbdmgr.exe fixes resolve the two most common post-installation problems.
| 🔗 More topic clusters on this site Windows OS Troubleshooting & Performance | Data Recovery & Storage Management | Networking, VPN & Remote Access | Security & Password Management | Microsoft Office & Productivity Apps |